Feed dogs down, attach the Darning (aka Hopper) foot, place your fabric backed with Iron-on-Vilene under the foot, foot down and away we go!
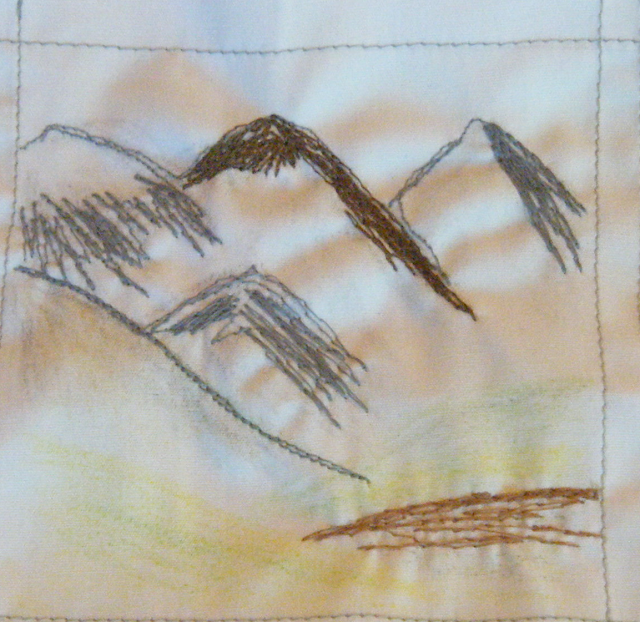
Here is our Tutor, Sue Bennet's Sample Mountain above. Firstly, colour a background with Watercolour or soft leaded pencils or crayons in greys, greens and browns; then using Straight Stitch start to 'shade' in the slopes with the darkest colour first and adding the lighter coloured threads after to form Snow or Glaciers.
Remember to tilt your work in the direction of the slopes!
Dark looming mountains awaiting their snowy sides, above. Equally you could use this technique to form lava flowing down a volcano. Love the verdant greens of the hills in the foreground.Tip - when covering your fabric with dense stitching it is a good idea to bring your bottom/bobbin thread; up to the top of your work. To do this simply lower your needle into the work and bring it back up again, catching the bobbin thread with a pair of tweezers. (computerised sewing machines have a needle up/down facility. Simply press the button once to take the needle down and again to raise it. It will bring the bobbin thread up with it).
Hold onto both threads and sew a few stitches in the same place to secure them. Snip off.
This is a good practise as it prevents the threads from tangling and snarling at the back of your work.
Quilters often do this when quilting on a home sewing machine and will use an open eyed/self-threading needle to take the thread to the back of the work once finished, where they will knot the threads the take them into the wadding to hide them. (needle is brought out again onto back and thread pulled taught before snipping. Pulling it taught allows the thread ends to bounce back into the wadding layer and are therefore hidden). This makes for much neater work that is also more secure - no unravelling thread with this method.
Just starting to stitch the darker parts of the slopes here. Browns can also be used not just greys (N.B. Black is a little too harsh for peaks that are in the distance).
Another sample from Sue, above. Lovely green hills. Remember to make your hills or mountains different shapes as they would be in Nature.
Below are some more hills of Sue's in various shades of grey thread. One also has some green added - this could depict the moss on rocks, for example.
Well, that is just a little taster of what you can do with a little imagination, a Darning Foot and dropping your Feed Dogs. Not forgetting a really great Teacher! Thank you Sue.
Next up - free machined Trees.


No comments:
Post a Comment